Daisy Nail Art Trend 2025 Bright, Cute & Pinterest Ready 🌼
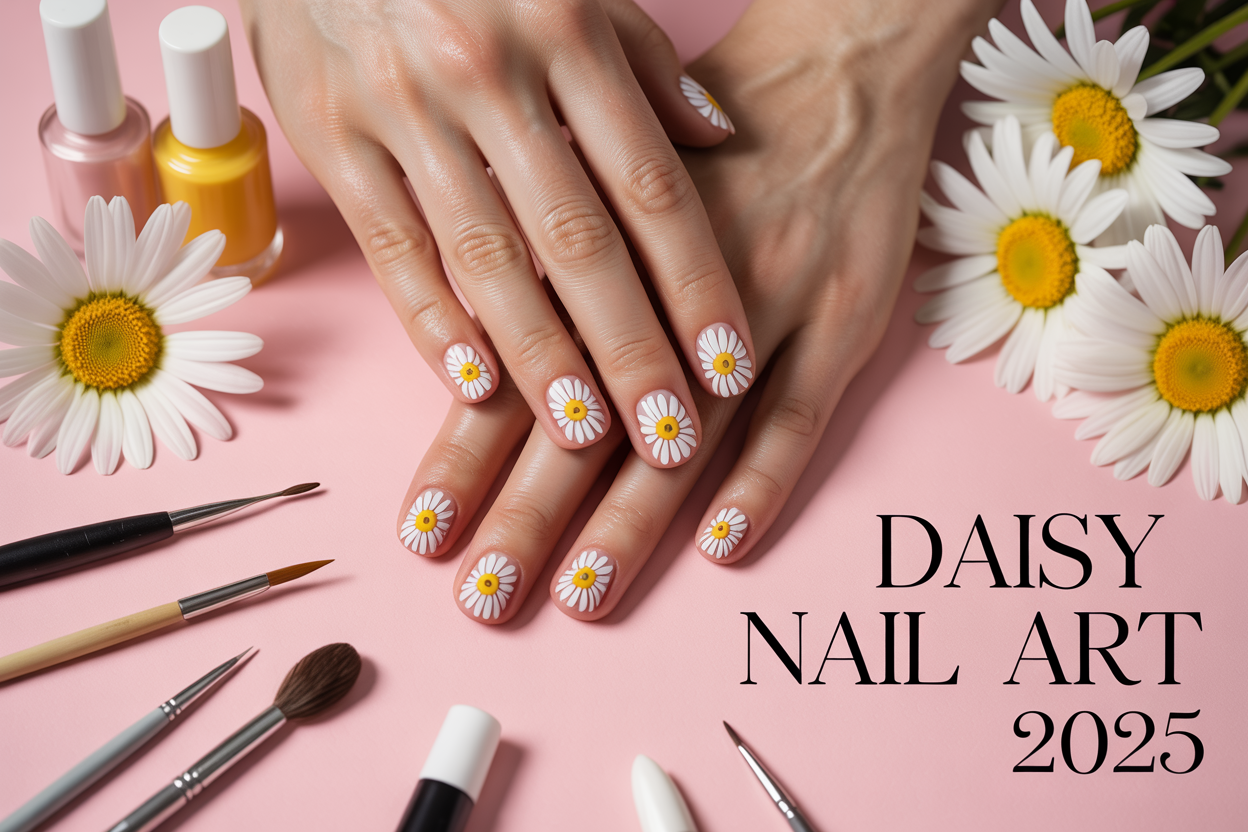
Daisy nail art is taking over social media feeds and nail salons everywhere, bringing fresh spring vibes to your fingertips year-round. This adorable trend combines bright, cheerful colors with simple floral designs that look way more complicated than they actually are.
Perfect for nail art beginners, DIY enthusiasts, and anyone wanting Instagram-worthy manicures without the salon price tag, daisy nails offer endless creative possibilities. The best part? You can create these cute designs at home with just a few basic tools and some practice.
In this guide, we'll walk you through the essential supplies you need to get started, plus step-by-step techniques that make creating perfect daisy nail designs totally doable. We'll also share the hottest color combinations for 2025 that'll make your daisies pop and give you pro tips for getting those camera-ready results that'll have your Pinterest boards looking amazing.
Get ready to master this sweet floral trend that's equal parts cute and trendy! 🌼
Why Daisy Nail Art is the Must-Have Trend for 2025

Boost Your Style with Nature-Inspired Beauty
Nature-inspired beauty has taken center stage in 2025, and daisy nail designs are leading this botanical revolution. These cheerful blooms represent more than just a pretty pattern – they bring an authentic touch of garden freshness to your fingertips. The simple yet striking appearance of daisies makes them perfect for the modern minimalist aesthetic that's dominating social media feeds this year.
Daisy nail art effortlessly bridges the gap between sophisticated elegance and playful charm. The clean white petals and sunny yellow centers create a timeless color palette that works with virtually any outfit, from business casual to weekend brunch looks. This versatility has made daisy nail designs the go-to choice for fashion-forward individuals who want their manicure to complement their personal style without overwhelming it.
The trend toward natural elements in beauty reflects our collective desire to reconnect with the outdoors, especially after years of indoor living. Daisy nails offer that perfect dose of sunshine and positivity that brightens your entire look. Whether you opt for a single delicate bloom on each nail or create an entire garden across all ten fingers, these nature-inspired designs instantly elevate your style game.
Create Instagram-Worthy Manicures That Stand Out
Social media has completely transformed how we think about nail art, and daisy nail designs 2025 are perfectly positioned to dominate your feed. The high contrast between white petals and colorful backgrounds creates that coveted "pop" factor that photographers and content creators love. These designs photograph beautifully under both natural and artificial lighting, making them ideal for those picture-perfect moments.
The Pinterest nail art community has embraced daisies with open arms, creating countless variations that range from minimalist single blooms to elaborate garden scenes. The beauty of daisy designs lies in their adaptability – you can create content for any aesthetic, whether you're going for soft girl vibes, cottagecore charm, or bold statement nails.
Bright nail art ideas featuring daisies generate significant engagement because they strike the perfect balance between trendy and timeless. The simple flower shape is instantly recognizable, making your manicure memorable and shareable. Content creators are discovering that daisy nail tutorials consistently perform well because viewers can easily recreate these designs at home, leading to user-generated content that extends your reach organically.
Express Your Feminine Side with Delicate Floral Details
Floral nail art designs have always been a powerful way to showcase femininity, and daisies represent the perfect embodiment of delicate beauty. The soft, rounded petals and gentle curves create an inherently feminine aesthetic that feels both romantic and approachable. Unlike more complex flowers that might feel overwhelming, daisies maintain that sweet spot between detailed artistry and wearable elegance.
The delicate nature of daisy petals allows for subtle color variations and shading techniques that add depth without appearing heavy-handed. You can play with different textures, from matte finish petals to glossy centers, creating visual interest while maintaining the flower's inherently gentle character. This attention to detail speaks to a refined feminine aesthetic that values quality craftsmanship.
Cute nail art trends in 2025 are all about celebrating femininity in its many forms, and daisies offer endless possibilities for personal expression. Whether you prefer tiny, dainty blooms scattered across nude bases or bold, oversized flowers in vibrant colors, daisy designs allow you to communicate your unique style while embracing your feminine energy. The versatility of this motif means you can adjust the design to match your mood, from barely-there elegance to confident, eye-catching statements.
Essential Tools and Supplies for Perfect Daisy Nail Designs

Choose the Right Base Colors for Maximum Pop
Your base color sets the entire mood for your daisy nail designs 2025. Light, dreamy shades like soft pink, lavender, or classic nude create the perfect canvas for bright white and yellow daisies to truly shine. These gentle backgrounds make your flower nail art pop without competing for attention.
Pastel blue and mint green bases work beautifully for spring nail designs, giving your daisies a fresh, garden-party vibe that's perfect for Pinterest. For summer nail trends 2025, consider coral or peachy tones that complement the warm yellow centers of your daisies.
Don't overlook clear or sheer bases - they create an elegant, minimalist look that lets your daisy nail art take center stage. This approach works especially well for accent nails or when you want a more subtle floral design.
Select Quality Brushes for Precise Petal Creation
The right brushes make all the difference between amateur-looking flowers and professional daisy nail designs. A fine detail brush (size 0 or 00) is your best friend for creating delicate, realistic petals. Look for brushes with synthetic bristles that hold their shape well and won't fray after a few uses.
A striping brush works wonders for creating longer, more dramatic daisy petals. These thin, precise brushes help you achieve consistent petal shapes and sizes across all your nails.
| Brush Type | Best For | Size Recommendation |
|---|---|---|
| Detail Brush | Small petals, fine lines | Size 0-00 |
| Striping Brush | Long petals, stems | 2-3mm width |
| Flat Brush | Filling larger petals | Size 2-4 |
Keep a fan brush handy for creating textured petal effects or blending colors seamlessly. Clean your brushes immediately after use with acetone or brush cleaner to maintain their precision and longevity.
Pick Long-Lasting Polishes That Won't Chip
Quality polish makes your cute nail art trends last weeks instead of days. Gel polishes are the gold standard for daisy nail art because they cure under UV light, creating a durable, chip-resistant finish that keeps your designs looking fresh.
For the white petals, choose a high-opacity polish that covers evenly in one coat. Cheap white polishes often appear streaky or require multiple coats, making your daisy petals look bulky and unprofessional.
Yellow centers need a vibrant, pigmented polish that won't fade or turn muddy over time. Look for polishes labeled "one-coat coverage" or those with excellent reviews for color payoff.
Consider investing in a quality top coat that adds both shine and protection. A good top coat can extend your bright nail art ideas by several days and gives that glossy, camera-ready finish perfect for social media.
Gather Dotting Tools for Professional-Looking Centers
Professional-looking daisy centers require the right dotting tools. A basic dotting tool set with various sizes (typically ranging from 1mm to 5mm) covers most daisy designs. The larger dots work perfectly for statement daisies, while smaller ones create delicate, scattered flower arrangements.
Bobby pins make excellent impromptu dotting tools and create perfectly round centers. Clean the tip with acetone between colors to prevent muddy mixing.
Toothpicks work great for creating texture within the yellow centers - drag the tip gently through wet polish to create a more realistic, dimensional look. This technique adds professional polish to your floral nail art designs.
Keep cotton swabs and acetone nearby for quick cleanup around the centers. Perfect circles make the difference between homemade and salon-quality daisy nails.
Step-by-Step Techniques for Creating Stunning Daisy Nails

Master the Basic Five-Petal Daisy Method
Creating gorgeous daisy nail art 2025 starts with nailing the fundamental five-petal technique. Begin with a clean, base-coated nail and choose your daisy placement carefully. Using a small detailing brush or dotting tool, create the first petal by making an oval shape with white nail polish. Position this petal pointing toward 12 o'clock on your nail.
Work clockwise, adding four more petals evenly spaced around an imaginary center circle. Each petal should be roughly the same size and shape, with a slightly rounded tip and narrower base. The trick to professional-looking daisy nails step by step is maintaining consistent pressure and brush angle throughout each stroke.
For beginners, practice the motion on paper first. Load your brush with enough polish to complete one petal without reloading, but not so much that it bleeds or creates thick, uneven strokes. Clean your brush between each petal to maintain crisp edges and prevent color muddying.
Quick Reference for Petal Placement:
-
Petal 1: 12 o'clock position
-
Petal 2: 2:30 position
-
Petal 3: 5 o'clock position
-
Petal 4: 7:30 position
-
Petal 5: 10 o'clock position
Add Realistic Texture with Layering Techniques
Elevating your daisy nail designs 2025 from basic to stunning requires mastering layering techniques that create depth and dimension. After your base petals dry completely, add subtle shading using a slightly deeper shade of your petal color mixed with the tiniest amount of gray or beige.
Using a fine brush, apply this darker shade along one edge of each petal, creating a natural shadow effect. This technique works especially well for Pinterest nail art that needs to photograph beautifully under different lighting conditions.
Create texture variation by adding tiny lines within each petal using a striper brush. These delicate veins should run from the base toward the tip, mimicking real daisy petals. Use a color that's just one shade darker than your base petal color for the most natural effect.
Layering Sequence for Maximum Impact:
-
Base petal color (let dry 2-3 minutes)
-
Shadow edges with darker tone
-
Add petal veins with striper brush
-
Optional: Light highlight on opposite edge of shadow
For spring nail designs that truly stand out, consider adding a subtle shimmer topcoat only to the petal tips. This catches light beautifully and creates movement that makes your flower nail art tutorial results look professionally done.
Perfect Your Yellow Center Dots Every Time
The center dot makes or breaks your daisy design, so getting this element right is crucial for floral nail art designs that look polished and complete. Use a dotting tool that's proportional to your flower size - typically a medium-sized tool works best for most nail lengths.
Load your dotting tool with bright yellow polish, ensuring you have enough product for a smooth, even circle. Place the tool in the center of your daisy petals and apply gentle, steady pressure while slowly rotating the tool. This rotation technique prevents flat spots and creates perfectly round centers every time.
For bright nail art ideas that really pop, consider using a slightly orange-tinted yellow rather than pure yellow. This warmer tone photographs better and complements most skin tones beautifully. After the yellow center dries, add tiny white dots around the perimeter using a smaller dotting tool to simulate the daisy's natural center texture.
Center Dot Pro Tips:
-
Clean dotting tool between each flower
-
Work quickly while polish is wet for smoothest finish
-
Add dimension with tiny orange or gold flecks
-
Size centers proportionally: small flowers need small centers
Double-check your center placement before the polish sets. If it's slightly off-center, use a clean, pointed brush dipped in acetone to gently adjust the position while the polish is still workable.
Trendy Color Combinations That Make Your Daisies Pop

Classic White Petals on Pastel Backgrounds
White daisy nail designs 2025 shine brightest against soft, dreamy pastels that make your floral nail art designs pop without overwhelming the delicate petals. Baby pink, lavender, mint green, and powder blue create the perfect canvas for your daisy nail art masterpiece. These gentle hues mirror real daisy environments while maintaining that Instagram-worthy aesthetic everyone's searching for.
The magic happens when you paint crisp white petals with bright yellow centers on these subtle backgrounds. Coral pink bases work especially well for spring nail designs, giving your daisies a romantic, feminine touch that's perfect for brunches and garden parties. For a more sophisticated look, try sage green or dusty rose - these colors make your white daisies appear fresh and modern.
Consider alternating pastel shades across different nails for a gradient effect that's totally Pinterest nail art worthy. Paint your thumb and ring finger in mint, your index and pinky in lavender, and your middle finger in baby pink. This creates visual interest while keeping the overall design cohesive and elegant.
Bold Neon Daisies for Summer Vibes
Summer nail trends 2025 are all about making a statement, and neon daisy nails deliver exactly that energy. Electric pink petals on bright yellow backgrounds create an eye-catching contrast that screams confidence and fun. These bright nail art ideas work perfectly for beach vacations, music festivals, and any time you want to turn heads.
Hot pink, electric blue, and lime green petals against contrasting neon backgrounds create that bold, playful vibe that's perfect for summer. Try neon orange petals with electric purple centers on a bright turquoise base - it sounds wild, but the result is surprisingly harmonious and totally on-trend.
The key to pulling off neon daisy nail designs is balance. If you're going full neon on your petals, keep the centers more subdued with white or pale yellow. Alternatively, use neon centers with white or pastel petals for a more wearable approach that still packs a punch.
Sunset-Inspired Orange and Pink Variations
Sunset daisy designs capture those gorgeous golden hour moments in your cute nail art trends. Think warm oranges melting into soft pinks, with petals that mirror the sky during magic hour. These colors work beautifully together because they're naturally harmonious - just like real sunsets.
Start with a peachy-orange base and create daisy petals in coral pink with golden yellow centers. This combination feels warm and inviting, perfect for late summer days or tropical getaways. For a more dramatic sunset effect, use deep orange petals that fade to soft pink at the tips, creating an ombré effect within each petal.
Burnt orange with rose gold accents adds sophistication to your sunset theme. Paint your daisies in burnt orange with champagne centers, then add tiny rose gold dots around each flower for extra sparkle. This technique elevates your flower nail art tutorial from casual to party-ready.
Minimalist Black and White Modern Looks
Black and white daisy nail art brings a chic, modern twist to traditional floral designs. This timeless combination works perfectly for those who love clean lines and sophisticated aesthetics. White petals on black backgrounds create dramatic contrast, while black petals on white bases offer a more subtle, artistic approach.
For the ultimate minimalist vibe, try single black daisy outlines on nude or clear bases. This negative space technique keeps things simple yet striking - perfect for office environments or when you want something understated but special. Add just one accent nail with a fully painted black and white daisy for the perfect balance.
Consider geometric variations where daisy petals become angular rather than rounded. This modern interpretation of classic daisy nail designs feels fresh and contemporary while maintaining the recognizable flower shape. Use thin black lines to create outlined daisies, filling only the centers with white or leaving them transparent for an ultra-modern effect.
Creative Placement Ideas to Maximize Visual Impact

Feature Nails That Draw Attention
Creating stunning feature nails is all about strategic placement that catches the eye without overwhelming your overall look. The most popular approach for daisy nail designs 2025 involves focusing on your ring finger and thumb - these naturally draw attention when you gesture or hold items. Paint these two nails with your boldest daisy designs while keeping the remaining nails in complementary solid colors or subtle patterns.
Consider asymmetrical placement for a modern twist. Paint three daisies on your middle finger and a single large bloom on your pinky, leaving other nails in soft pastels. This unexpected arrangement creates visual interest and perfectly captures that Pinterest nail art aesthetic everyone's craving.
For maximum impact, vary the size of your daisies on feature nails. Place one large central daisy surrounded by two smaller blooms, creating a natural bouquet effect. This technique works especially well with bright nail art ideas using yellow centers and white petals against a sage green or sky blue base.
Scattered Daisy Patterns for Playful Appeal
Scattered patterns bring an effortless, whimsical vibe that's perfect for spring nail designs and summer nail trends 2025. Instead of placing daisies in uniform rows, randomly distribute small blooms across all ten nails. This creates movement and keeps viewers engaged as their eyes travel from nail to nail.
Mix different daisy sizes throughout your scattered design - combine tiny buds with medium flowers and the occasional larger bloom. This variation mimics how daisies naturally grow in fields and meadows. Paint some daisies at different angles, with petals pointing in various directions to enhance the organic, carefree feeling.
The key to successful scattered daisy nail art lies in maintaining visual balance. Avoid clustering too many flowers on one side of your hand. Instead, imagine your nails as a canvas and distribute the blooms so each nail contributes to the overall composition. Leave some negative space on each nail to prevent the design from feeling crowded.
Use this placement style with soft, dreamy color palettes for cute nail art trends that photograph beautifully. Scattered mini daisies in white and pale yellow over a gradient base from pink to lavender creates an Instagram-worthy finish.
French Tip Variations with Daisy Accents
Transform the classic French manicure by incorporating delicate daisy accents along the tip line. Replace the traditional white tips with a soft colored base, then add tiny daisies that peek over the edge. This subtle approach works beautifully for those who want floral nail art designs without going full-blown flower power.
Create a reverse French look by painting daisies at the base of your nails instead of the tips. This unexpected placement draws attention to your cuticle area and creates an elegant, sophisticated vibe. Use neutral bases with white daisies and soft yellow centers for a timeless appeal that works for both casual and formal occasions.
For a contemporary twist, try diagonal French tips with daisy borders. Paint the diagonal line in a soft mint or peach shade, then add a row of miniature daisies following the diagonal edge. This modern take on flower nail art tutorial techniques creates clean lines while maintaining that playful daisy charm.
Double French tips offer another creative option - paint traditional white tips, then add a second line of tiny daisies just below the white edge. This layered approach adds depth and interest while keeping the overall design clean and wearable for everyday activities.
Pro Tips for Long-Lasting and Camera-Ready Results

Seal Your Design with Quality Top Coat
Your gorgeous daisy nail designs deserve protection that matches their beauty. A premium top coat isn't just the final step – it's your design's armor against chips, fading, and daily wear. Choose quick-dry formulas with UV protection to keep those bright colors vibrant under sunlight and indoor lighting.
Apply top coat in thin, even strokes, sealing the edges of each nail completely. This prevents water from seeping underneath and causing lift-off. For extra longevity, add a second thin layer after the first has completely dried. Professional nail artists swear by this double-coat method for daisy nail art that stays Pinterest-perfect for up to two weeks.
Perfect Your Lighting for Social Media Photos
Natural light transforms good daisy nails into Instagram gold. Position your hands near a large window during golden hour for that coveted soft, warm glow. If natural light isn't available, invest in a ring light with adjustable color temperature – it's a game-changer for capturing true colors.
Hold your phone at a slight angle rather than directly overhead to create depth and dimension. The shadows between petals will pop, making your daisy nail designs look three-dimensional. Avoid harsh fluorescent lighting, which can wash out delicate pastels and make white daisies appear dull.
Best photo angles for daisy nails:
-
45-degree angle from above
-
Side profile showing multiple nails
-
Close-up macro shots of detailed petals
-
Flat lay with props like real flowers
Avoid Common Mistakes That Ruin Your Look
Thick base coats are the enemy of clean daisy nail art. Heavy application creates ridges that show through your design, making petals look bumpy and unprofessional. Stick to two thin coats maximum, allowing full drying time between applications.
Rushing between steps kills even the most carefully planned designs. Wet polish smudges instantly when you add the next layer, turning crisp daisy petals into muddy blobs. Test each layer with a gentle fingertip tap – if it leaves an impression, wait longer.
Mistakes that destroy your manicure:
-
Painting over tacky base coat
-
Using old, thick polish that drags
-
Skipping cuticle prep
-
Applying designs to bent nails
-
Ignoring proper brush cleaning between colors
Speed Up Drying Time Without Smudging
Cold air accelerates polish curing without the heat damage that causes bubbles. Set a small fan on low speed, directing airflow across your nails while keeping hands steady. Ice water dips work wonders too – submerge dried-looking nails for 30 seconds to set the surface completely.
Quick-dry drops aren't just marketing fluff when used correctly. Apply one small drop per nail after your final top coat, letting it spread naturally without brushing. These oils penetrate polish layers, hardening from within while preventing that frustrating dent-prone stage.
Professional UV lamps designed for regular polish (not just gel) cut drying time in half. Two minutes under LED light creates a rock-hard surface that's ready for daily activities. Keep cuticle oil handy for post-lamp moisturizing, as the light can temporarily dry surrounding skin.

Daisy nail art has secured its spot as 2025's most charming trend, combining simplicity with stunning visual appeal. From mastering the basic tools to experimenting with bold color combinations, you now have everything you need to create Pinterest-worthy designs that capture attention. The beauty of daisy nails lies in their versatility—you can go subtle with classic white petals or make a statement with neon centers and creative placements.
Ready to join the daisy revolution? Start with simple designs using the techniques we've covered, and don't be afraid to experiment with different sizes and colors. Your social media followers will thank you for the fresh, cheerful content, and you'll love how these floral masterpieces brighten up your everyday look. Grab your dotting tools and get ready to bloom—your perfect daisy manicure is just a few brush strokes away.